Handmade tissue paper flowers are a fun and easy craft that anyone can do!
Whether you are decorating for a party, making a gift, or just adding some color to your home, these flowers are perfect.
Follow this simple step-by-step guide and create your own lovely tissue paper flowers!

Making Paper Flowers
Flowers make everything look bright and cheerful, but real ones don’t last forever. The good news? You can make your own tissue paper flowers with napkins.
They are easy, affordable, and can be used for decorate your home, or gifts. In this guide, you will learn how to create tissue paper flowers step by step.
Types Of Napkins to Use
We used 1ply paper cocktail napkins around 25x25cm (10×10 inches) in size when unfolded.
However, you can use other sized paper napkins provided they are not too thick, because it will make cutting through the layers quite difficult.
If you happen to have napkins that are quite thick check to see if you can separate it into single layers, to make it easier to handle.
Colors
We opted to use napkins that had a white back, to a achieve a two toned flower. However, you can use an all solid color paper napkin for a single toned flower.
What You Will Need
For each paper flower you will need:
- 3 cocktail paper napkins
- Elastic band, string or wire, to tie the centre
Step-by-Step Guide
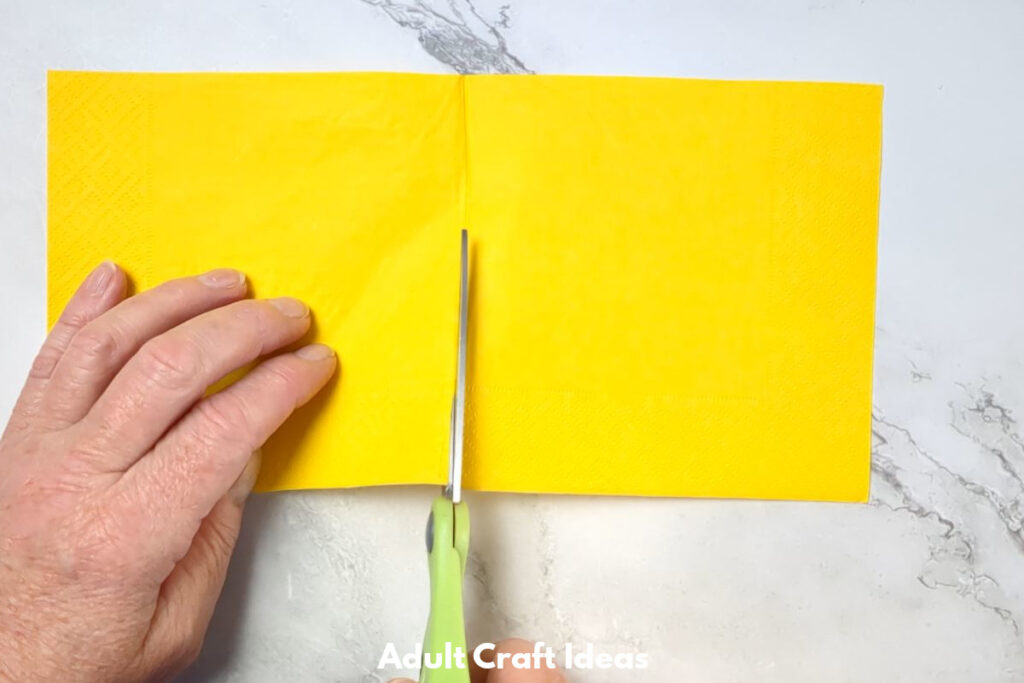
Step 1: Cut the Napkins
Unfold each napkin and cut down the centre to create two halves. You should have six pieces that measure about 25×12.5cm (10×5 inches).
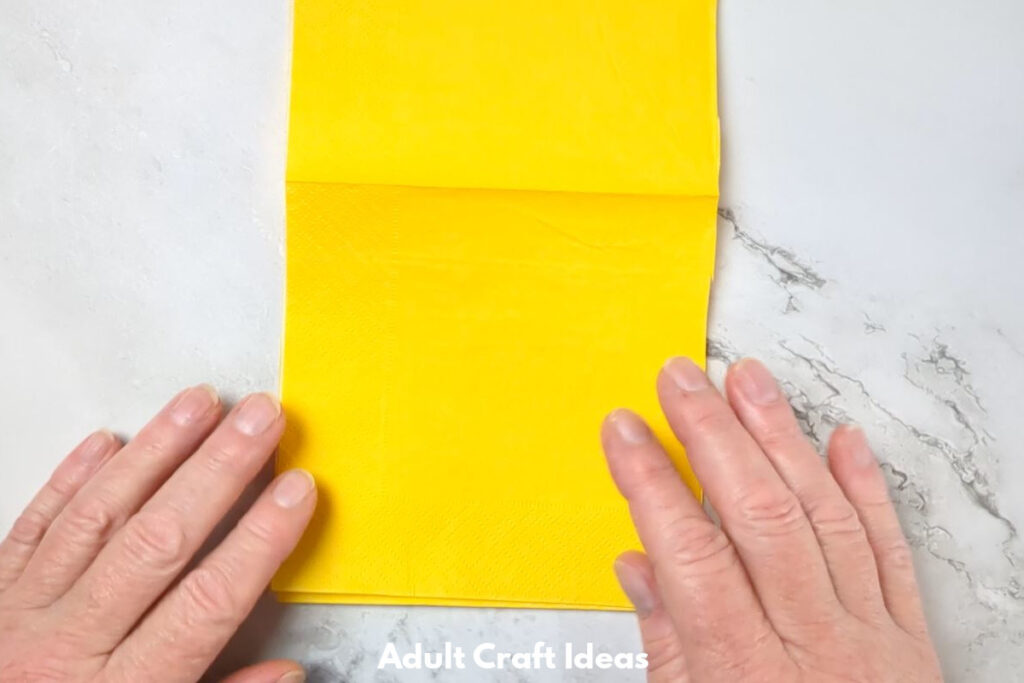
Step 2: Stack each piece on top of each other.
If using two toned napkins (one side white, the other colored) layer them by alternating color. Start by placing one piece colored side down, then another white side up, repeat until all the pieces are stacked.
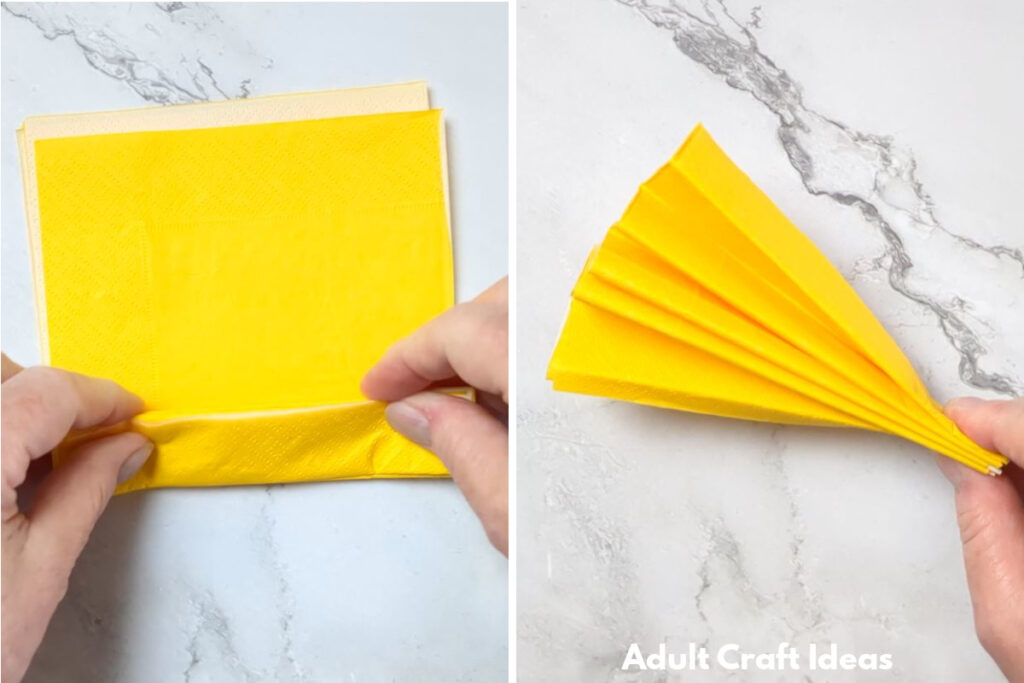
Step 3: Fold Like an Accordion
Starting at the 12.5cm (5inch) end, fold the tissue paper back and forth in an accordion style. Each fold should be about 2.5cm (1 inch) wide.
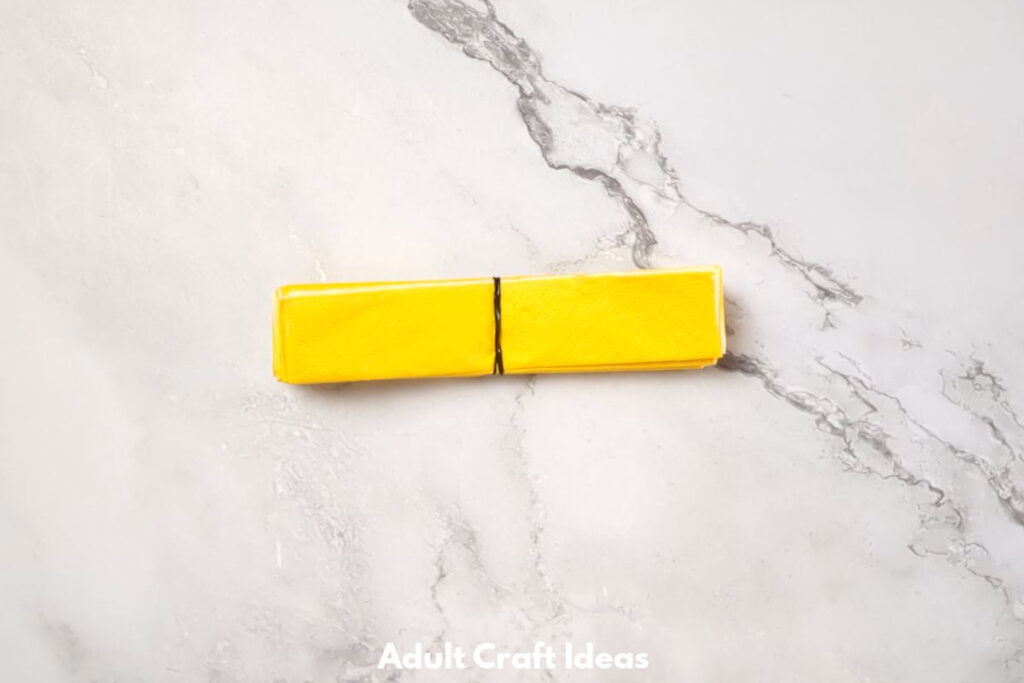
Step 4: Secure the Middle
Once the entire stack is folded, take an elastic (or small piece of wire or string) twist it around the middle, to hold the folds in place.
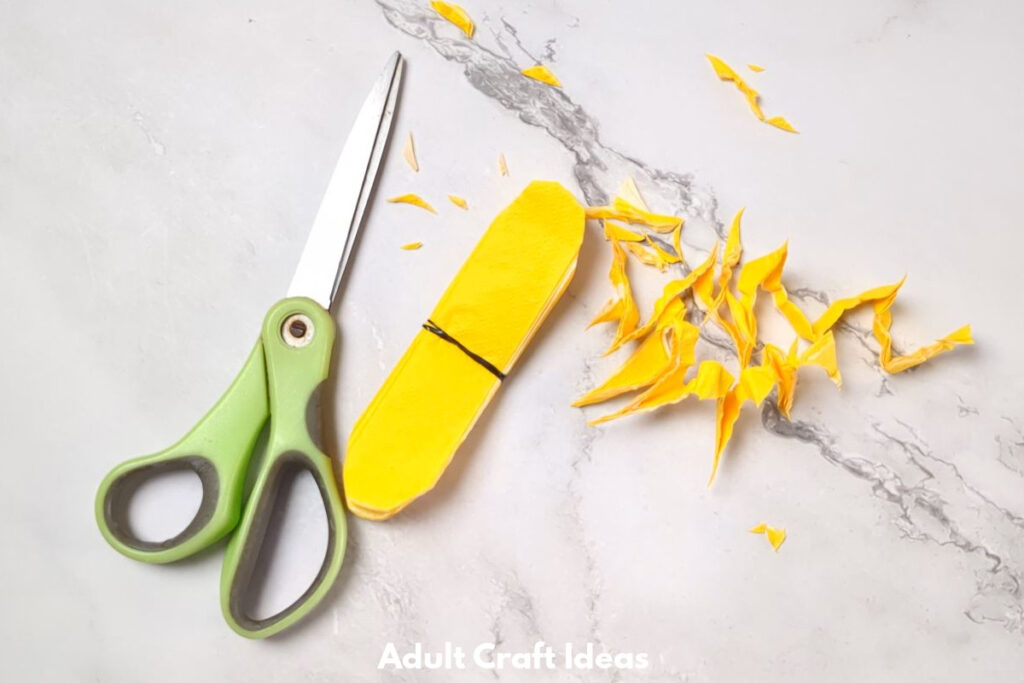
Step 5: Shape the Edges
Use scissors to trim the ends of your folded paper. You can round them for a soft petal look or cut them into points for a star-like flower.
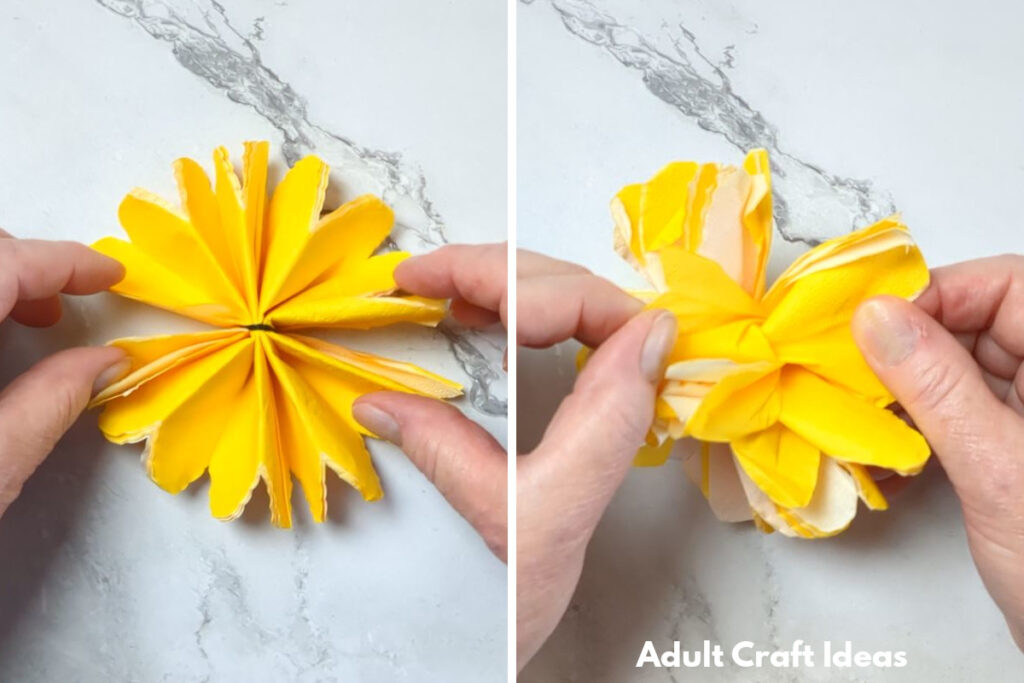
Step 6: Open Up the Flower
Gently pull apart each layer of tissue paper, fluffing them up to create the petals. Be careful not to tear the paper!
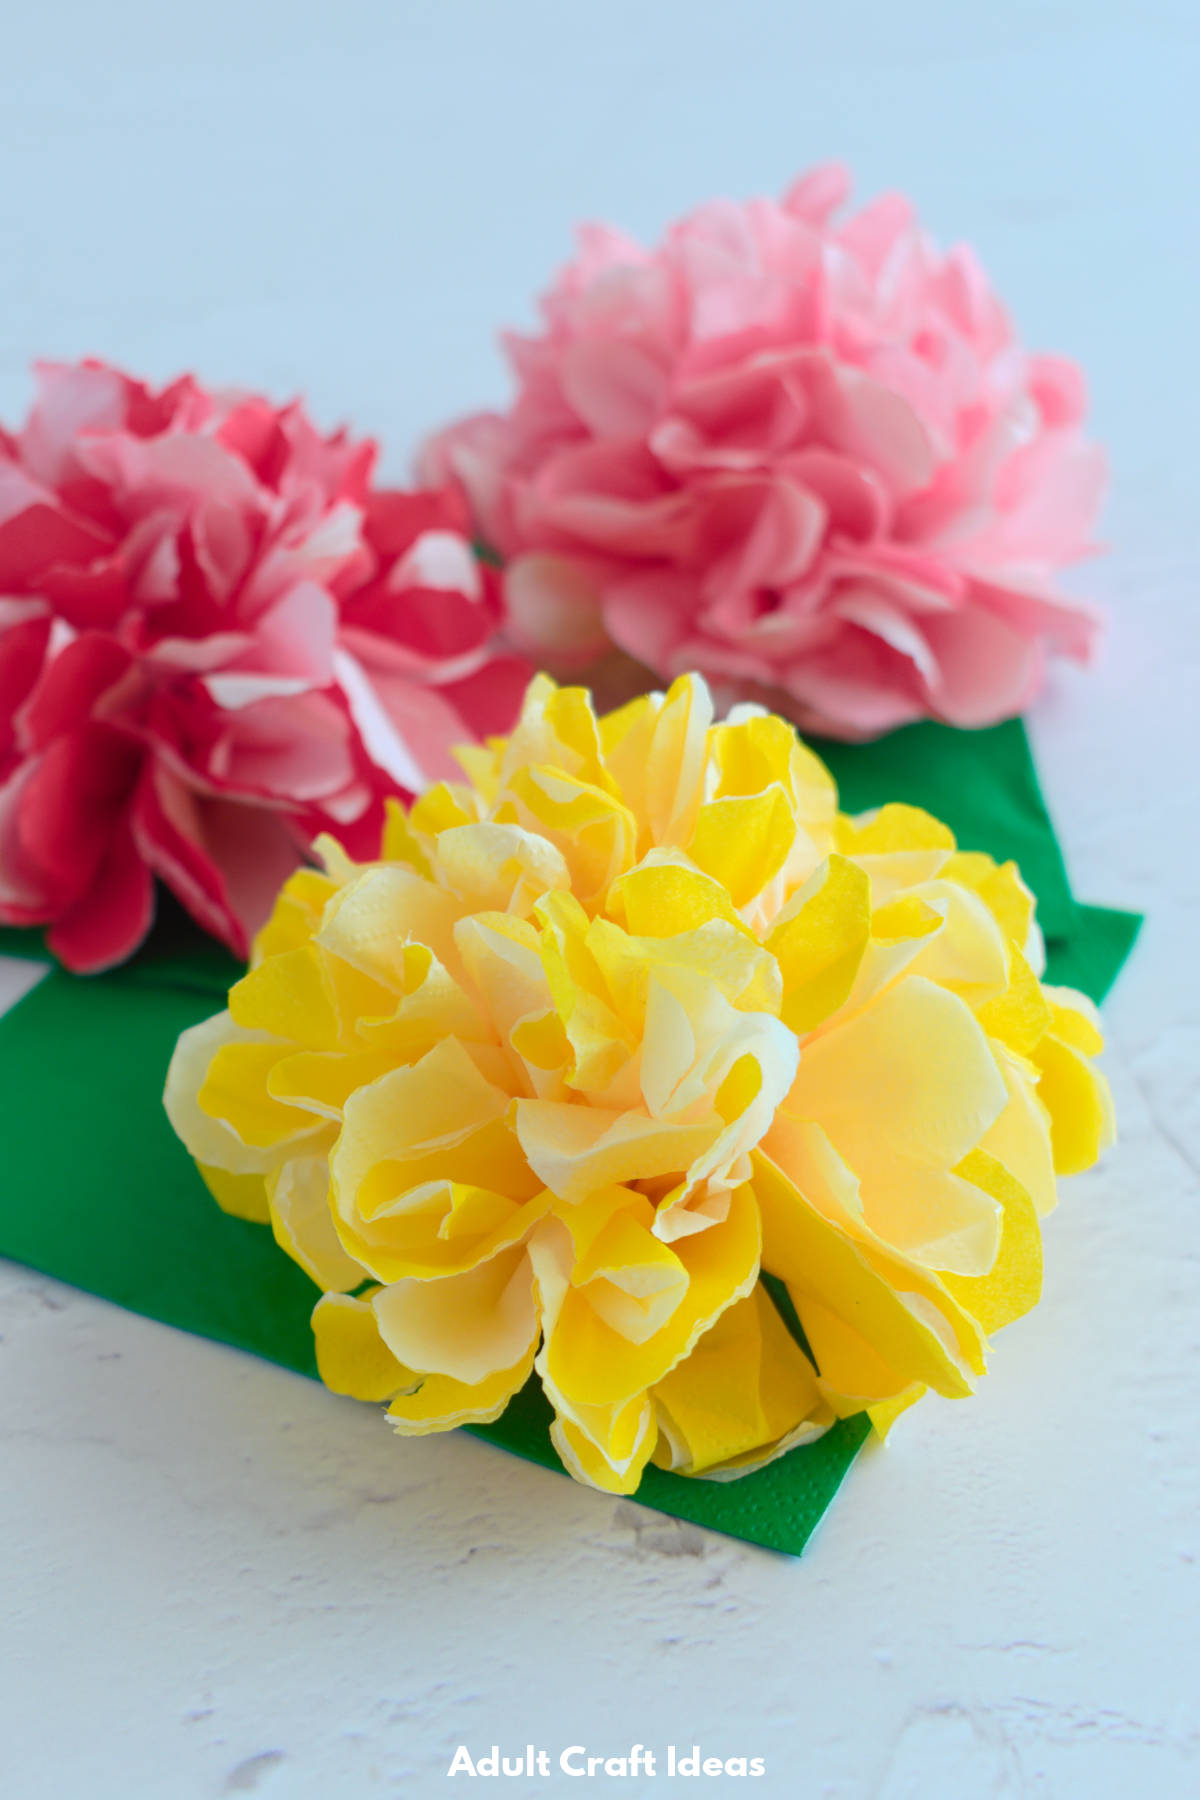
Step 7: Enjoy Your Beautiful Flower!
Once all the layers are fluffed, your tissue paper flower is ready to use!
Tips
- You don’t need to be perfect when rounding the ends of the paper to shape the petal. In fact, a less than perfect shape will enhance the look.
- When securing the centre of the flower don’t make it too tight. You need some room for movement when you pull and twist up the centre petals to cover the center tie.
- Don’t stress to much if the paper tears a little when shaping the petals, it will give them a more natural look.
Ways to Use Your Tissue Paper Flowers
- Party Decorations – Use them to decorate walls, tables, or even make a flower garland.
- Gift Wrapping – Attach a flower to a present to make it extra special.
- Home Decor – Place them in a vase or hang them on the wall.
- Wreaths – Use them in combination with other seasonal decorations, to make wreaths for occasions like Easter, Valentines Day, Mother’s Day or Christmas.
Final Thoughts
Tissue paper flowers are simple to make but look amazing! Try experimenting with different colors and sizes to create a unique bouquet. Whether you use them for a special event or just for fun, they’ll add a lovely touch to any space.
This is a quick and easy project you should try it!
very cute!
Thank you!
Easier than it looks, will definitely try it 🙂
These are cute and like how you have step this out.